Archive
Windows 10 – Fix: Enable Feature .NET 3.5 Error 0x800F0906 and 0x800F081F
Within Windows 10 you can add the following Windows Feature – .NET Framework 3.5 (includes .NET 2.0 and 3.0) as shown below. Simply type Windows Features in the Windows Search bar on the taskbar and select Turn Windows Features on or off
To enable this feature simply tick the checkbox and click OK.
When the wizard ran through it’s process I was faced with the following error:
Windows couldn’t complete the requested changes.
Windows couldn’t connect to the Internet to download necessary files. Make sure you are connected to the Internet, and press “Retry” to try again.
Error code: 0x800F0906
Using the wizard I was unable to fix this error. Therefore to fix this issue, follow the steps listed below.
Fix:
- Open Windows Explorer (Windows + E)
- Mount the Windows 10 installation ISO you used to install your operating system. You can do this by right clicking on it and selecting the option Mount. UPDATE: If you have the Windows 8 Installation Disc in your optical drive, then use this instead. However, make sure you change the commands mentioned later to match your optical drive.
- Use the RUN command in administrator elevated mode. You can do this by navigating to the location c:\windows\system32\cmd.exe and right-clicking on the cmd.exeapplication and selecting Run as administrator.
- Once the command windows has loaded, then type the following command (Note: Match the drive letter to your appropriate drive letter for the ISO or DVD):
dism /online /Enable-Feature /FeatureName:NetFX3 /All /Source D:\Sources\SxS /LimitAccess
Hit enter once you have completed the command.
Below is a screenshot of what this will look like when you hit enter.
Now your Windows Feature of .NET Framework 3.5 (includes .NET 2.0 and 3.0) is enabled. To verify this, open the Window Features again to see the option is now enabled.
Success! You have the Windows Feature enabled.
Hope this helps!
Greg Olsen
YellowDuckGuy
Windows 10 – God Mode or Access Detailed System Settings
You are probably wondering what this blog post is all about? Keep reading ..
You have all seen this screen right? – The Control Panel in Windows.
There is a new settings window in Windows 10 as shown below. Therefore finding the old control panel hard to find for some. You could just type Control Panel in the taskbar search bar and you will simply find it. However, lets keep on the God Mode topic. Keep reading.
God mode is something the community or internet is talking about at the moment recently, just briefly.
Firstly, to enable god mode, you will need to create the following folder on your desktop (or wherever) and name the folder as shown below. Feel free to copy and paste the test below.
itsgrego.{ED7BA470-8E54-465E-825C-99712043E01C}
If you want this file without creating it, you can download a zipped file of this folder, by clicking here.
Once you have created you new folder you should see the folder change to look like the following image.
Now if you open this folder you have created, you will see a full system settings (known as God Mode) displayed in a new window. You can now get to all those special settings for Windows 10 in one handy location.
Now save the folder in a safe place so you can get quick access to these settings. You may even want to right-click and select Pin to Quick Access so it appears in your options within Windows Explorer.
Enjoy!
Greg Olsen
YellowDuckGuy
Microsoft Dynamics CRM–Support with Windows 10, Edge and Office 2016
A lot of us now have moved onto Windows 10 and enjoying the new operating system, well personally I can say I am. This blog post will reference another blog post on the Microsoft Dynamics CRM Support Blog regarding CRM support with Windows 10, the new Edge Browser and Office 2016.
In summary:
All Dynamics CRM releases including CRM 2011, CRM 2013, and CRM 2015 currently support Windows 10 for use with the web client. The supported browser is Internet Explorer 11.
Support of Microsoft Dynamics CRM 2015 on Edge browser will be available for CRM 2015 with Update 0.2 (7.0.2) and Update 1.1 (7.1.1) in September.
Support with Microsoft Dynamics CRM 2013 will be introduced in Update Rollup 4 for Service Pack 1 (6.1.4)
For more information, head along to the URL below:
Greg Olsen
YellowDuckGuy
Windows 10 Technical Preview – Step-By-Step Install
This blog post will give you a step-by-step look into the installation of Windows 10. This installation I have used the Windows 10 Technical Preview release. At the time of this blog post, v10049 is the latest build version available.
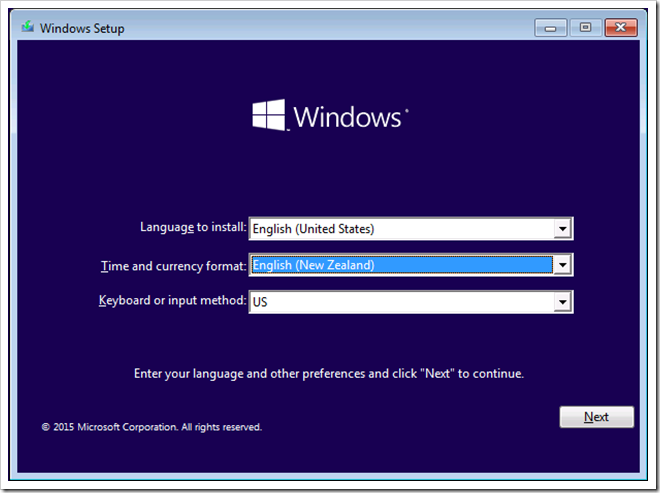
Step 1 – Select Language and other preferences.
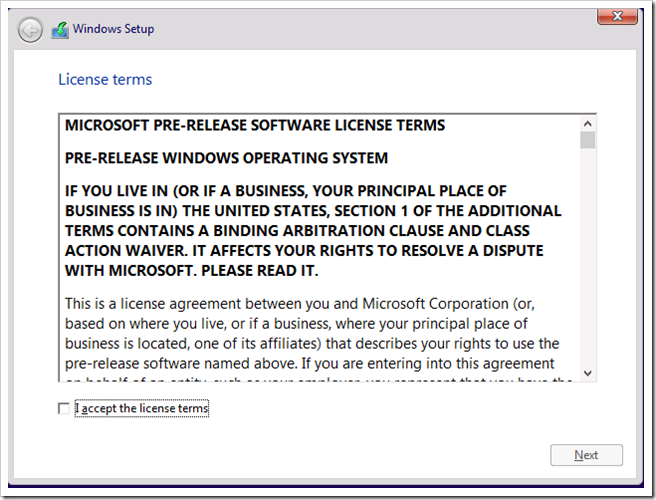
Step 2 – Accept license terms
Step 3 – Select installation type
From the screen above, I selected Custom: Install Windows only (advanced) option.
Step 4 – Select where to install Windows
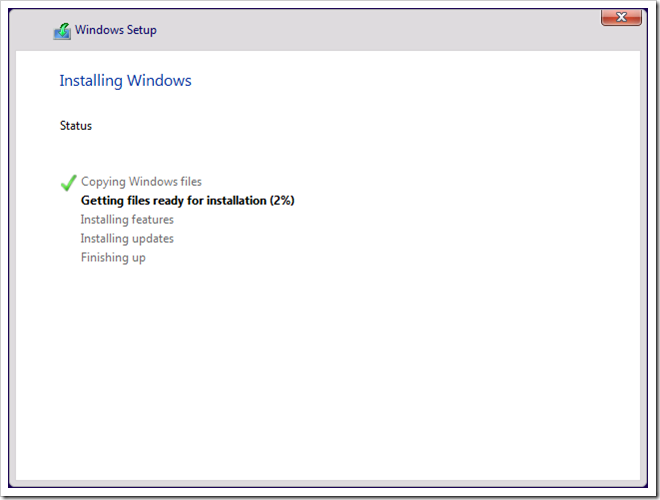
Step 5 – Windows now starts installation
Step 6 – Customise settings
From the screenshot above, I simply selected Use express settings
Step 7 – Windows checks connections and other settings
Step 8 – Setup the first logon account
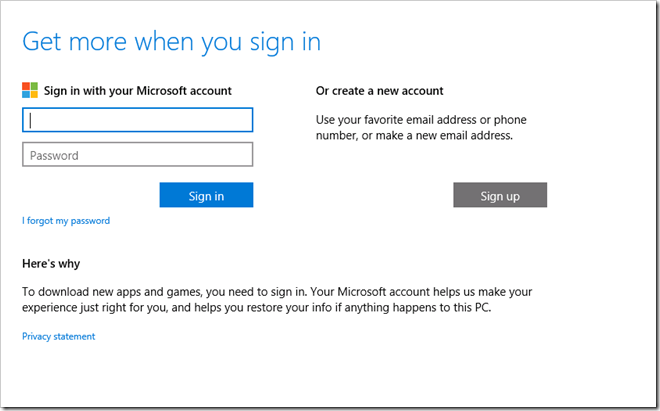
Step 9 – Setup the first logon account
From the screenshot above I decided I didn’t want to use my Microsoft Account (formally known as a Windows Live account) . Therefore I clicked Sign up (don’t worry about signing up, I have a process to pass the sign up stage on the next screen).
Step 10 – Create a Microsoft account
From the screenshot above, I didn’t create a new account, therefore you can click the text at the bottom Connect my account later.
Step 11 – Create an account for this PC
Since I didn’t use a Microsoft Account, I will need to create a local account on the Windows 10 installation. I filled in the required details on the screenshot above and clicked Next.
Step 11 – Windows is completing the install ..
From the screenshot above, windows installation is underway.
Step 12 – Windows install is completed!
Finished! – That was easy right?
More about Windows 10 can be found here:
http://windows.microsoft.com/en-nz/windows-10/about?ocid=WIN10_0_WOL_Hero_Home_Windows-10_Null_01
Greg Olsen
YellowDuckGuy


